
Dynamo version 0.7.1 officially replaces version 0.6.3 as the most recent stable build. The shift from Dynamo 0.6 to 0.7 represents a significant refactoring of the original code base. The new software architecture allows for better performance, more robust geometry, sophisticated interactions between traditional scripting and visual programming, and loading of external software libraries. If you followed along with the development process over the past few months with the daily builds and the 0.7.0 alpha release, you’ll know that there is a lot that’s new. We hope you’ll love it.
New in Dynamo 0.7.1:
- Revit 2014 and Revit 2015 compatible
- Dynamo runs standalone, without Revit
- Integrated DesignScript syntax in code blocks (See the blog post.)
- Vastly expanded geometry library (See the blog post.)
- Automated upgrading from 0.6.3 files to 0.7
- Visualization performance improvements
- Library reorganization
- Library loading (experimental)
- New opening page
- Node UI enhancements
- Node/Geometry navigation improvements (See the blog post.)
- Automated graph organization (See the blog post.)
- Preview Bubble overhaul
- New sample content
- New file structure (See the blog post.)
The last alpha release, version 0.7.0, was the initial release to demonstrate some of Dynamo’s new capabilities. Since then, we have been improving stability and building an automated migration manager to preserve as much of your 0.6.3 workflows as possible. Find more info at the Dynamo Wiki. Stay tuned for a blog post on migrating your workflows from 0.6.3 to 0.7.1.
Geometry
The new geometry tools in Dynamo 0.7 are vastly expanded from those that were available in 0.6.3 and earlier versions. Dynamo now has the same geometry engine that supports Inventor, Fusion, and other Autodesk products. No longer is Dynamo—or Revit—limited to the geometry available from Revit’s conceptual mass editor.
In the words of Peter Boyer, Dynamo developer: “Revit, meet NURBS.”

Rather than give you a catalog of everything the Dynamo geometry library allows you to do, you should check it out yourself. There are now fully five ways to make a circle. I rest my case.

Download the sample file FiveCircles.dyn.
Code Blocks
Code blocks will change your life. They’re awesome. The release of Dynamo version 0.7.1 marks the end of the first step in integrating the text-based language DesignScript into Dynamo’s visual scripting environment, which provides a powerful alternative to and extension of node-based scripting. But don’t worry—nodes are not going away! Code blocks simply let you script faster and more precisely with the same language of nodes, inputs, and outputs that you’re used to in the rest of Dynamo. There is so much to say about code blocks:
Here’s how to use them:
Here’s why to use them:
Code blocks give you flexibility. They can hold numbers, formulas, strings, and call any other node! Now there are even more ways to get your work done. Here are four different ways to make the same point:

All-new sample files

The best way to learn is by doing. Check out the new collection of sample files, which install with Dynamo, and can be found in the help menu. Samples are organized in five categories:
| Basics | Visual scripting, points, and creating series |
| Core | Advanced lists, code blocks, functions, and strings |
| Geometry | Curves, surfaces, and solids |
| Import/Export | Moving data to and from CSV and Excel |
| Revit | Adaptive families, color, floors, and levels |
When you install Dynamo, the sample files are written to C:\ProgramData\Dynamo\0.7\samples. This is a hidden folder in Windows, so to get there, you will either have to view hidden folders or type the address directly into the search bar. All of the Revit samples are made to work with one base file: C:\ProgramData\Dynamo\0.7\samples\Revit\DynamoSample.rvt. To run these samples most effectively, open this Revit file first, then open the sample file in Dynamo.
User experience improvements
New start page. Easily access recent files, examples, learning materials, the forum, and more.

Gray is the new orange. You spoke, we listened.

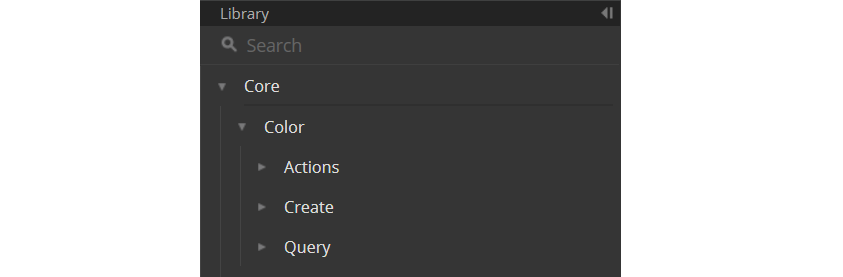
Library reorganization. Each section of the library is generally organized with the subcategories Action, Create, and Query. The Create category contains nodes that create objects of that type, like making a circle from a point and a radius. The Action category has nodes that do something to an object of that type, like chopping a list in pieces. And the Query category contains nodes that you extract information that already exists, like getting a parameter value from a Revit element.
New node naming convention. “Normal nodes,” most of them, now have a two-part name separated by a dot that tells you (object).(what it does). They’re like small sentences. List.Create makes a list. Circle.ByCenterPointRadius makes a circle using a center point and a radius. You get the picture. Anything starting with “By” like ByCenterPointRadius or ByCoordinates makes something. Operators like add, greater than or equal, and multiply are named simply by the symbol you would use when you type them: +, >=, *, etc. Built-in functions (there’s a special category for them) and other “UI”-type nodes like Watch and Slider do not use the dot notation (they aren’t callable from code blocks).

Automatic graph organization. This could be useful to clean up migrated version 0.6.3 workflows that look cluttered. See the blog post here.

Visualization performance enhancements. Besides being faster, you now have direct control over the precision with which your geometry is rendered. With large, highly curved models, you may want to turn down the precision for faster interaction. Turn it up (in the Settings menu) to see your curvy creations more accurately.

Geometry view. New visualization ability with “Geom View” to navigate the background preview without so many nodes in the way. Toggle between “Geom View” and “Node View” with the buttons in the canvas, the option in the View Menu, the shortcut CTRL+G, or the Escape hotkey. See the blog post here.
