Dynamo’s new geometry library, as of the 0.7 branch, vastly expands your capability to model complex forms both in Dynamo and in any platform it touches. Can you imagine modeling a woven basket in Revit? Well, now you can. There is more to tell than can fit in any one blog post, so to learn more about any of these projects, get your hands dirty and download the sample file at the end of each section. Each of the projects is fully parametric, and you will be able to follow changes in an input slider through each graph by previewing geometry and looking at Watch nodes. Feel free to discover faster, more efficient, or more intuitive ways to solve some of these problems than I found.
Why are we modeling three different baskets? Because it’s a good scale to work with, and everyone likes a theme. We’ll call this one: Basket Case.
Special thanks to 360 Architects in Kansas City for the genesis of the idea for basket #1. It came out of a fun collaborative workshop session where we were exploring the then-brand-new geometry tools of Dynamo 0.7.0.
01. Solid Booleans and Transformations

This complexity of this “basket,” if you can call it that, lies in rotational transformations of rings. The rings themselves are made from the Boolean difference of two solid disks. Solid Boolean operations are particularly fast in Dynamo, especially as compared to Revit.
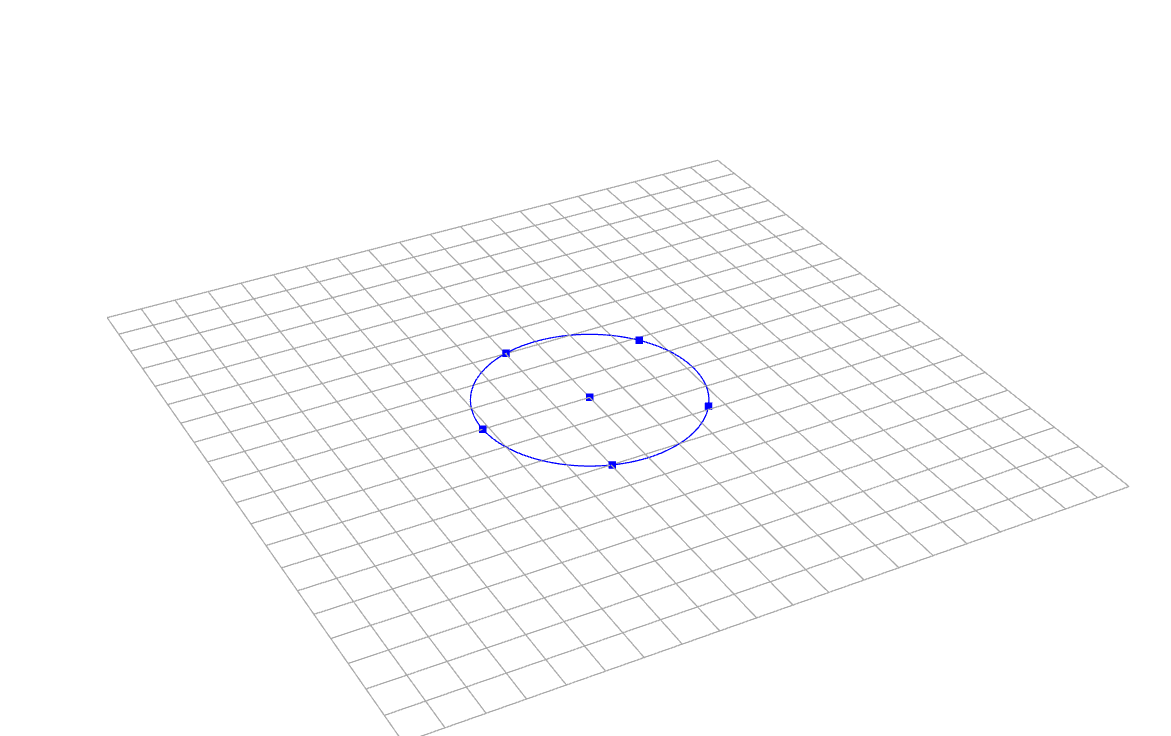 |
Array points equally around a circle. Use a series of parameters from 0 to 1 and Curve.PointAtParameter. Remember to account for the fact that the start and end points will be the same for a closed curve. | |
 |
Draw larger circles around each of these points. | |
 |
Extrude larger circles and slightly smaller circles just inside these with Curve.ExtrudeAsSolid. Use Solid.Difference to subtract the solid of the smaller disc from the larger disk, leaving a hoop. | |
 |
Rotate each hoop about the radius of the small circle in the middle with Geometry.Rotate. | |
 |
Rotate each hoop a second time about the tangent of the small circle. | |
 |
Increase the number of hoops. |

Download the file: Basket1.dyn.
02. Points, PolyCurves, and Extrusion

Points and lines are fundamental building blocks for most geometric projects in the scripting world, and this example makes good use of points in particular. Note that it is sometimes more convenient to treat points as vectors and that much of the geometric logic lies in the order of points in a list.
(The form of this basket is sometimes called a scroll saw basket. It’s made by sawing a flat piece of wood into a spiral, and the walls can be brought up from the base like a coiled spring.)
 |
Rotate the Vector.XAxis to the appropriate angles (360°/#sides) with Vector.Rotate. Scale each of these radial vectors with a series. Treat the inside of the spiral and the outside of the spiral separately. Create points from the vectors with Vector.AsPoint. | |
 |
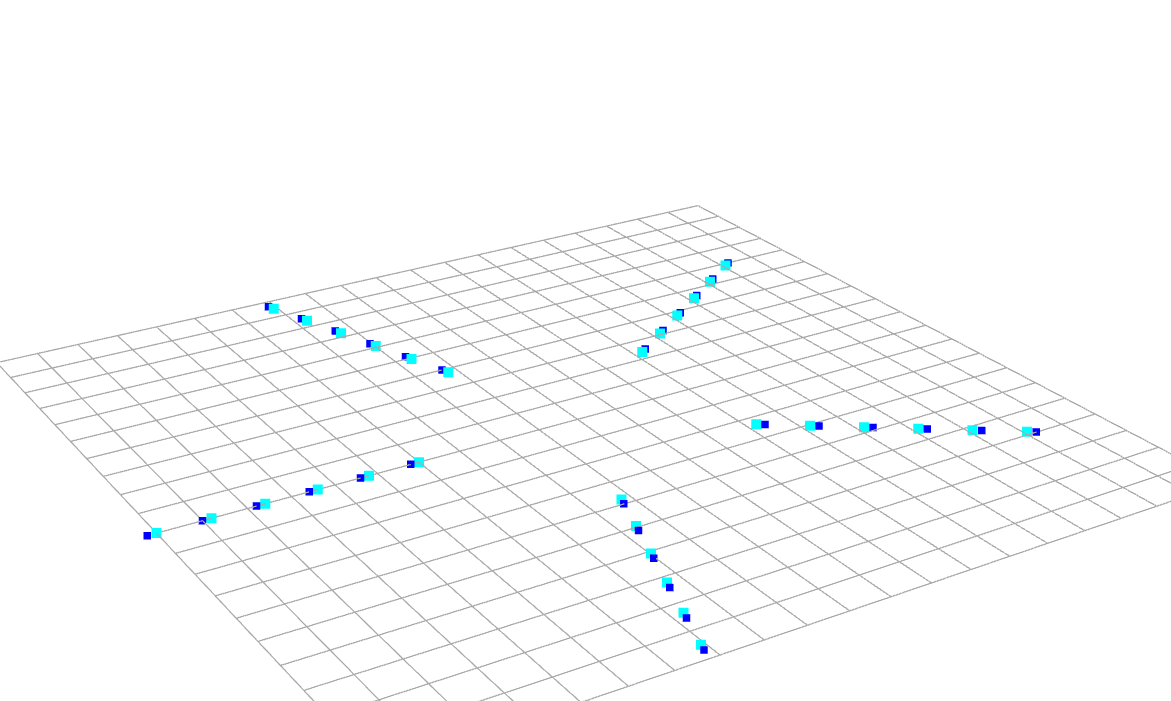
Rearrange the list of points so that they are organized in rings, then Flatten the lists into a spiral. Add a series of incrementally increasing vectors in the z-direction to the points with Point.Add to move them up. | |
 |
Reorganize the points into sets of four with List.Sublists, List.Reverse, and List.Join to describe the corners of each spiral segment. Create closed polycurves from these with PolyCurve.ByPoints. | |
 |
Create a solid for each segment with Curve.ExtrudeAsSolid. Optionally, join all of the solids together with Solid.UnionAll. |

Download the file: Basket2.dyn.
03. Intersection, Loft, Sweep, and Thicken

No lineup of baskets would be complete without something woven. And though weaving is perhaps more a demonstration of advanced list manipulation logic than strict geometry, this particular example shows off the power of NURBS curves, lofting, and surface thickening tools in Dynamo. You’ll definitely want to download this file, below.
 |
Create two ellipses and a point at the bottom that will define the shape of the basket. Use any shape you like. Your life will be simpler if the point at the bottom is Point.Origin. | |
 |
Array a number of planes evenly between 0° and 180° at the center. Find the intersection points between each plane and the ellipses with Geometry.Interesect. | |
 |
Use these points to define planar NurbsCurve.ByPoints‘s that will be the scaffolding for the “staves,” or “spokes,” of the basket. | |
 |
Use Curve.PointAtParameter to find the points where the weaves will cross. Draw line segments tangent to the curves there with Curve.TangentAtParameter and offset these toward the inside and outside of the basket. (See Vectors, below.) |
|
 |
With a little bit of list logic, connect the end points of every other line inside the basket with every other line outside the basket. You’ll need two opposite sets of curves for each weave to choose between later. | |
 |
Create a Surface.ByLoft between the top and bottom NURBS curves. Make the surface into a solid with Surface.Thicken. | |
 |
Cut off the construction lines at Geometry.ClosestPointTo for each of the staves with the top of the top weave. Draw lines at one end of each stave line perpendicular to the plane of the curve. (See Vectors, below.) | |
 |
Sweep the lines into surfaces with Surface.BySweep and thicken these surfaces as before. |

Download the file: Basket3.dyn.
04. Vectors
In scripted geometry, vectors are king. A vector, of course, is just a direction and a magnitude—an arrow, if you will. But there is so much hidden power to be harnessed to bend parametric surface to your will!
In this example, I simply explain how I calculated the vectors for basket #3 that pointed inside and outside the basket, perpendicular to the construction curves, at each point where a horizontal weave crossed a vertical stave. Once I had these vectors, they were immensely valuable throughout the rest of the definition.

First, pick a point along the curve with Curve.PointAtParameter.
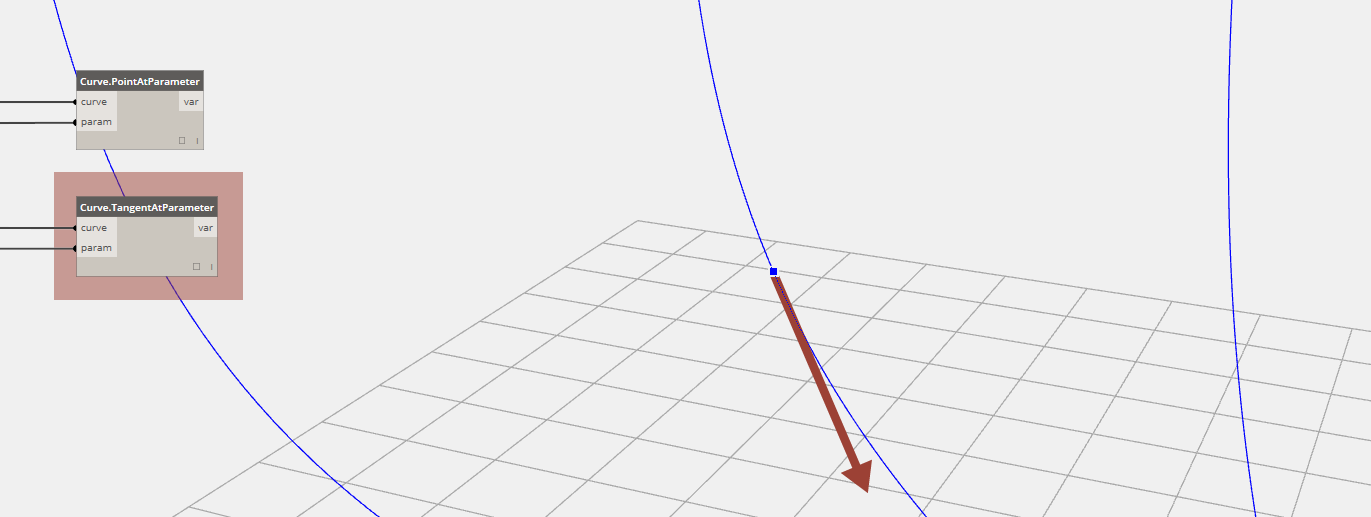
The vector parallel to the curve at that point is called the tangent, and you can find that directly too with Curve.TangentAtParameter.
The task remains to find a vector that is perpendicular to this one, but pointing either directly outside or inside the basket. The problem is that there are an infinite number of vectors perpendicular to this tangent vector, and to choose just one, we have to apply the restriction that it lie in the plane of the construction curve.

One trick, is to find any other vector (not parallel to the first vector) in the plane of the construction curve. Since all of the construction curves run through the origin, a vector from the origin, to that original point will do the trick. For insurance, to make sure the new vector won’t line up with the tangent vector, I’ve also made the new vector from the origin parallel to the horizontal, XY plane.

Once I have two vectors in the plane of the construction curve, I can take their cross product with Vector.Cross to get a vector that is perpendicular to both of the original two vectors. This is the same as the normal of the plane containing the blue construction curve.
(This might sound complicated, and you could find the plane of the curve first and just take the normal instead, but look how few nodes it takes to use vectors directly!)

I can then use just one more cross product operation to find the vector that is perpendicular to both the tangent vector (red) and the side-to-side vector (teal) to give me the final offset vector (green), which is the vector pointing outside the basket. The vector pointing inside is simply the negative of this one, or Vector.Reverse.
05. Make it Real
Okay, so how does any of this make it into Revit? Potentially a lot of ways—you can use geometry in Dynamo as a scaffolding to place Revit Elements, or you can import an instance of the geometry directly into a Revit family or project. For that last method, you have two options for this, ImportInstance.ByGeometry, which imports each item in a list as separate Revit imports, or ImportInstance.ByGeometries, which imports a collection of geometries, all at once, into one selectable Revit import instance.

Design alternative for the Sony Center in Berlin… ? Anyone… ?

Image of Sony Center from here.