Greetings, Dynamites!
A few weeks ago we introduced Dynamo 4.2 and its headline feature: Autodesk Assistant living inside your workspace, with DynamoMCP giving it the ability to work with your graph instead of only talking about it. At the time, that was a Sandbox-only story.
Not anymore. Revit 2027.3 ships with Dynamo 4.2.1, and Autodesk Assistant in Revit can now build, run, explain, and tidy up Dynamo graphs for you without leaving Revit.
This post walks through what that looks like in practice. If you would rather watch than read, the full walkthrough is in the video below. Everything here follows the same order.
TL;DR
- Revit 2027.3 includes Dynamo 4.2.1, and with it, Dynamo MCP.
- Autodesk Assistant in Revit already acts on your Revit model through Revit MCP. Dynamo MCP extends it into Dynamo.
- When you are in Revit, you talk to the Assistant panel embedded in Revit, not a separate one in Dynamo. One conversation, one place.
- From a single prompt, Assistant can place nodes, wire them, set inputs, run the graph, and report back.
- It can also explain an unfamiliar graph and then group and annotate it using Dynamo’s standard group styles.
- Try it, then tell us what worked and what did not on the Dynamo Forum.
What is MCP, and why does Dynamo have one?
MCP stands for Model Context Protocol. It is an open standard for connecting tools to AI agents so the agent can do things rather than just describe them. You can read more about the protocol itself at modelcontextprotocol.io.
Autodesk Assistant in Revit has its own set of tools through the Revit Public MCP Server. Ask it “what can you do for me?” and it will tell you it can query and explore your model, create and modify elements, and manage views, schedules, rooms, and levels. That is a lot on its own.
There are still things you will run into that Revit MCP cannot quite do. That is where Dynamo comes in. Dynamo MCP gives Assistant a second toolbox: search for nodes, read what is in the open workspace, place and connect nodes, set values, group things, run the graph, and interpret the results.
Which Assistant do I talk to?
This is the one thing worth keeping in mind for the Revit use case.
In Dynamo Sandbox, Autodesk Assistant opens as a panel right inside Dynamo’s UI, as described in the 4.2 release post. In Revit, you use the Autodesk Assistant that is embedded in Revit itself. That is intentional. You can ask about your model and your graph in the same conversation instead of bouncing between two panels.
To get set up:
- Install Revit 2027.3 and enable Autodesk Assistant in Revit.
- Launch Dynamo from the Manage tab, Visual Programming panel, Launch Dynamo. You should be on Dynamo 4.2.1.
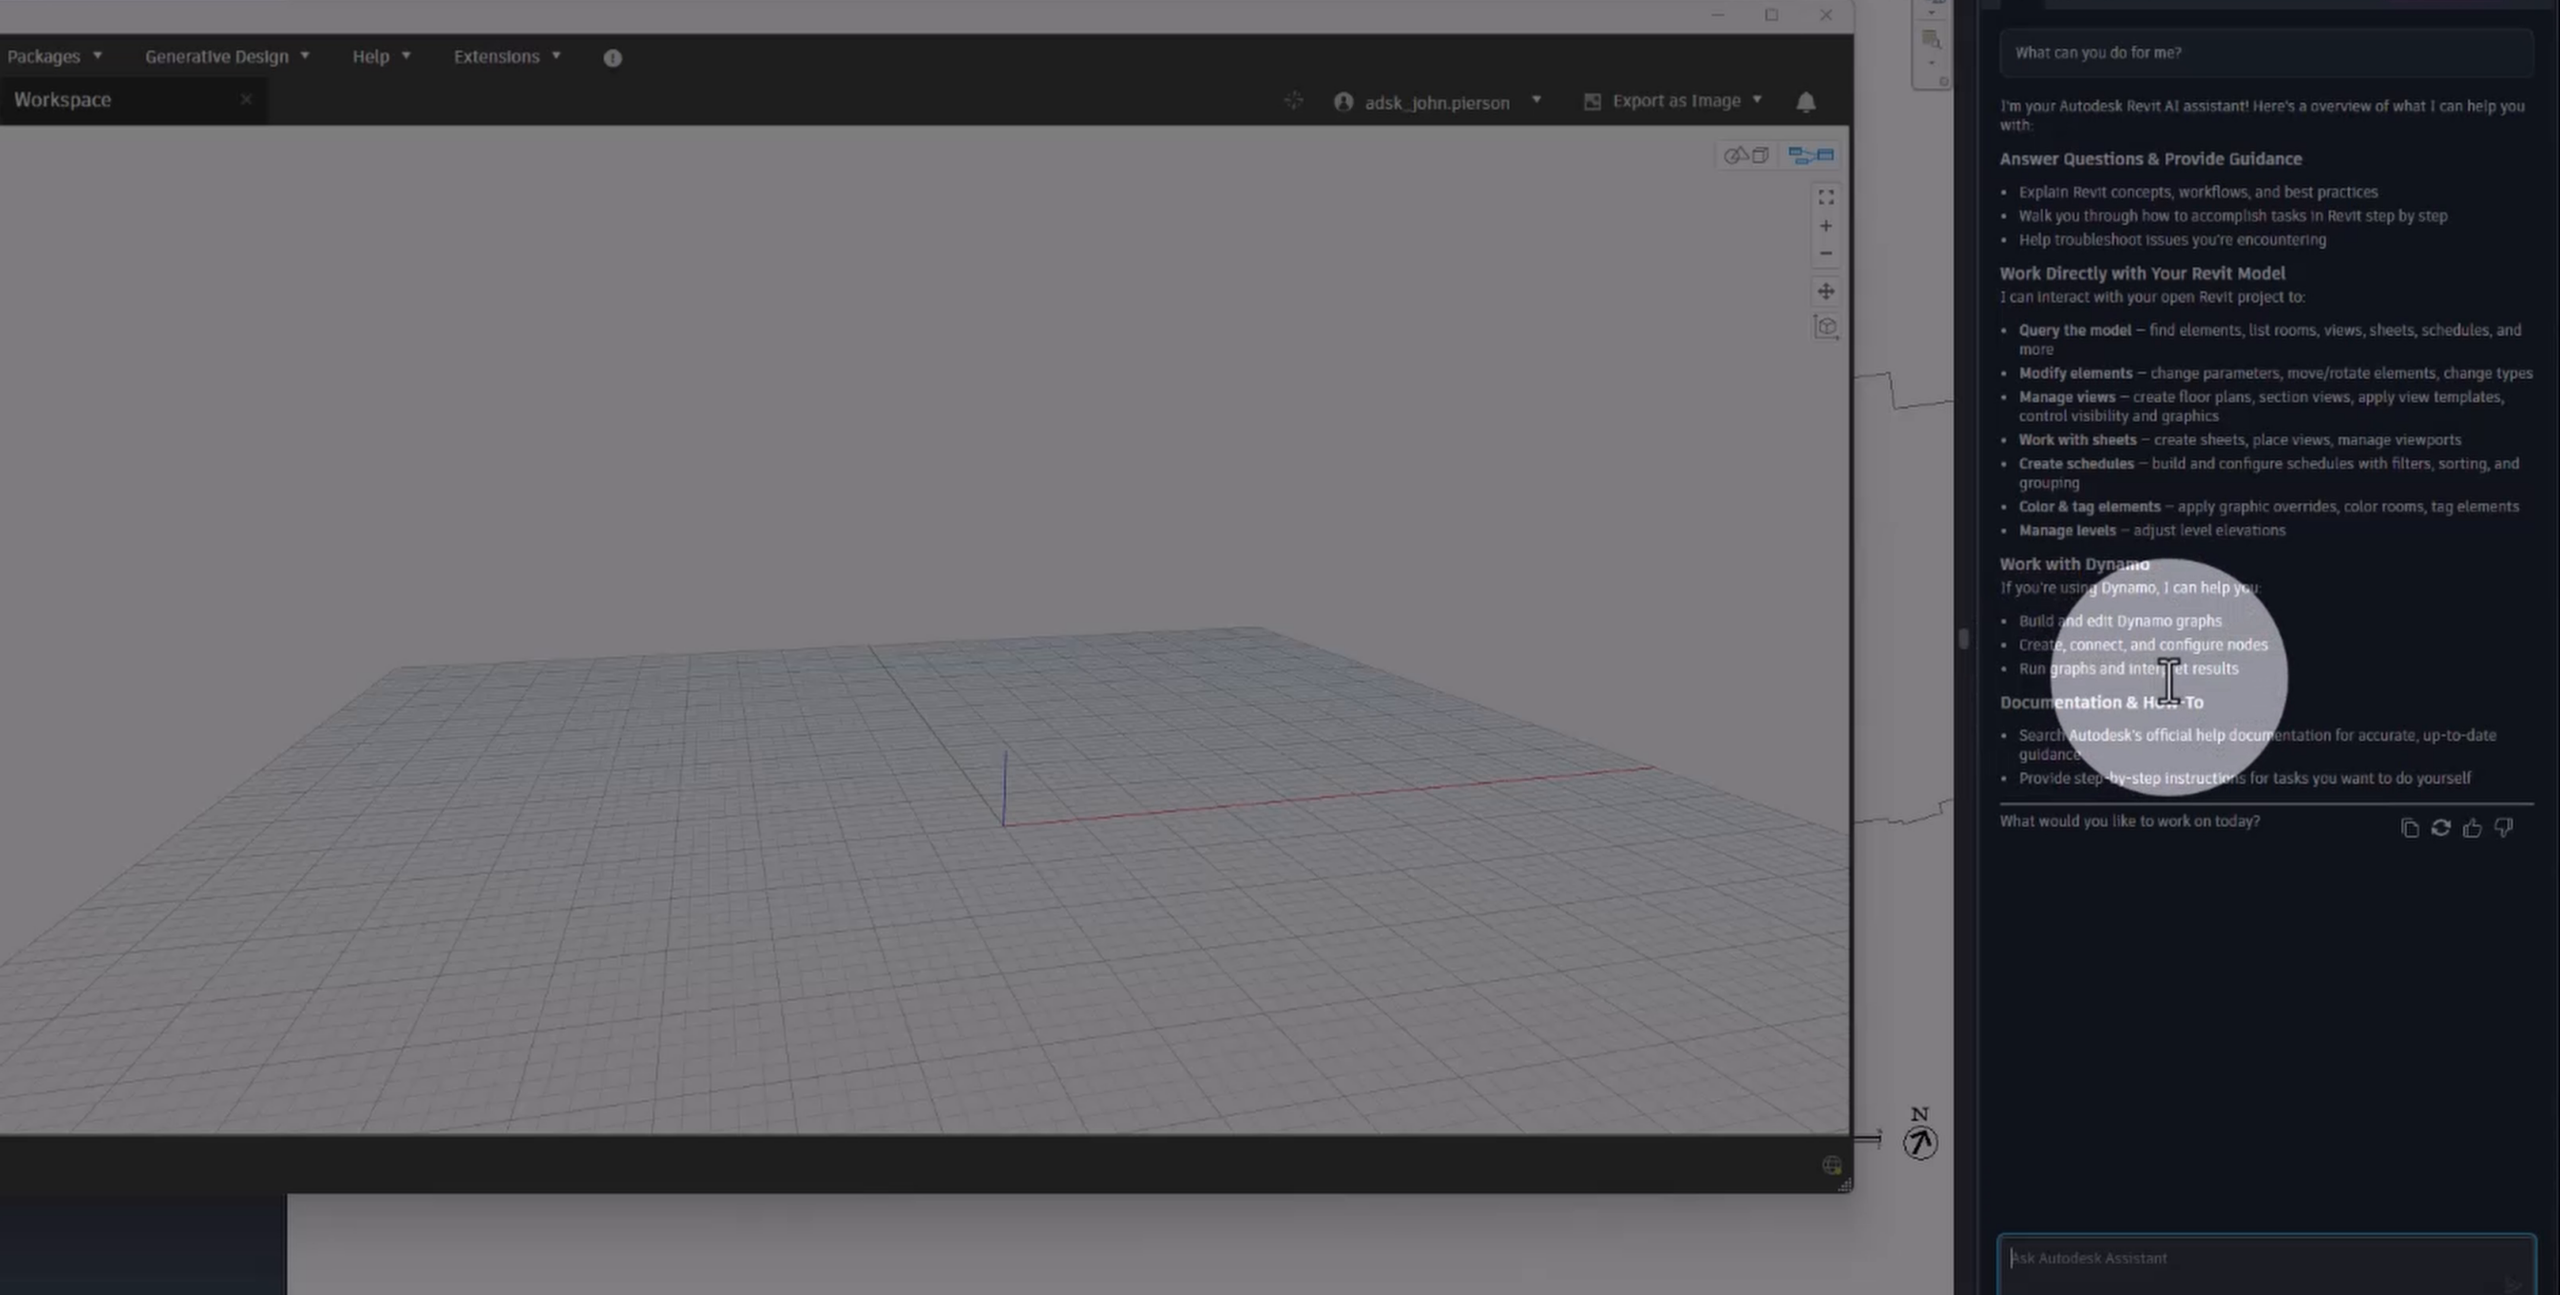
- In Autodesk Assistant, start a New Chat and ask “what can you do for me?”
You will see the same Revit capabilities as before, plus a new one: Work with Dynamo. Assistant tells you it can help build and edit Dynamo graphs, create, connect, and configure nodes, run graphs, and interpret results.
Hello World: build a graph from a prompt
Let’s start small. With a blank Dynamo workspace open, ask Assistant:
Make a cube in Dynamo, use sliders for the inputs.
Assistant thinks for a moment, then starts calling Dynamo MCP tools. It searches Dynamo for nodes it can use, looks at what the workspace currently contains, and builds a plan for the graph. Then it places a Cuboid node, places sliders because you asked for sliders, wires everything up, and runs the graph. Since the workspace is in Automatic run mode, the result shows up immediately.
When it finishes, it gives you a short write-up: sliders are set, the cuboid is built, you’re good to go.
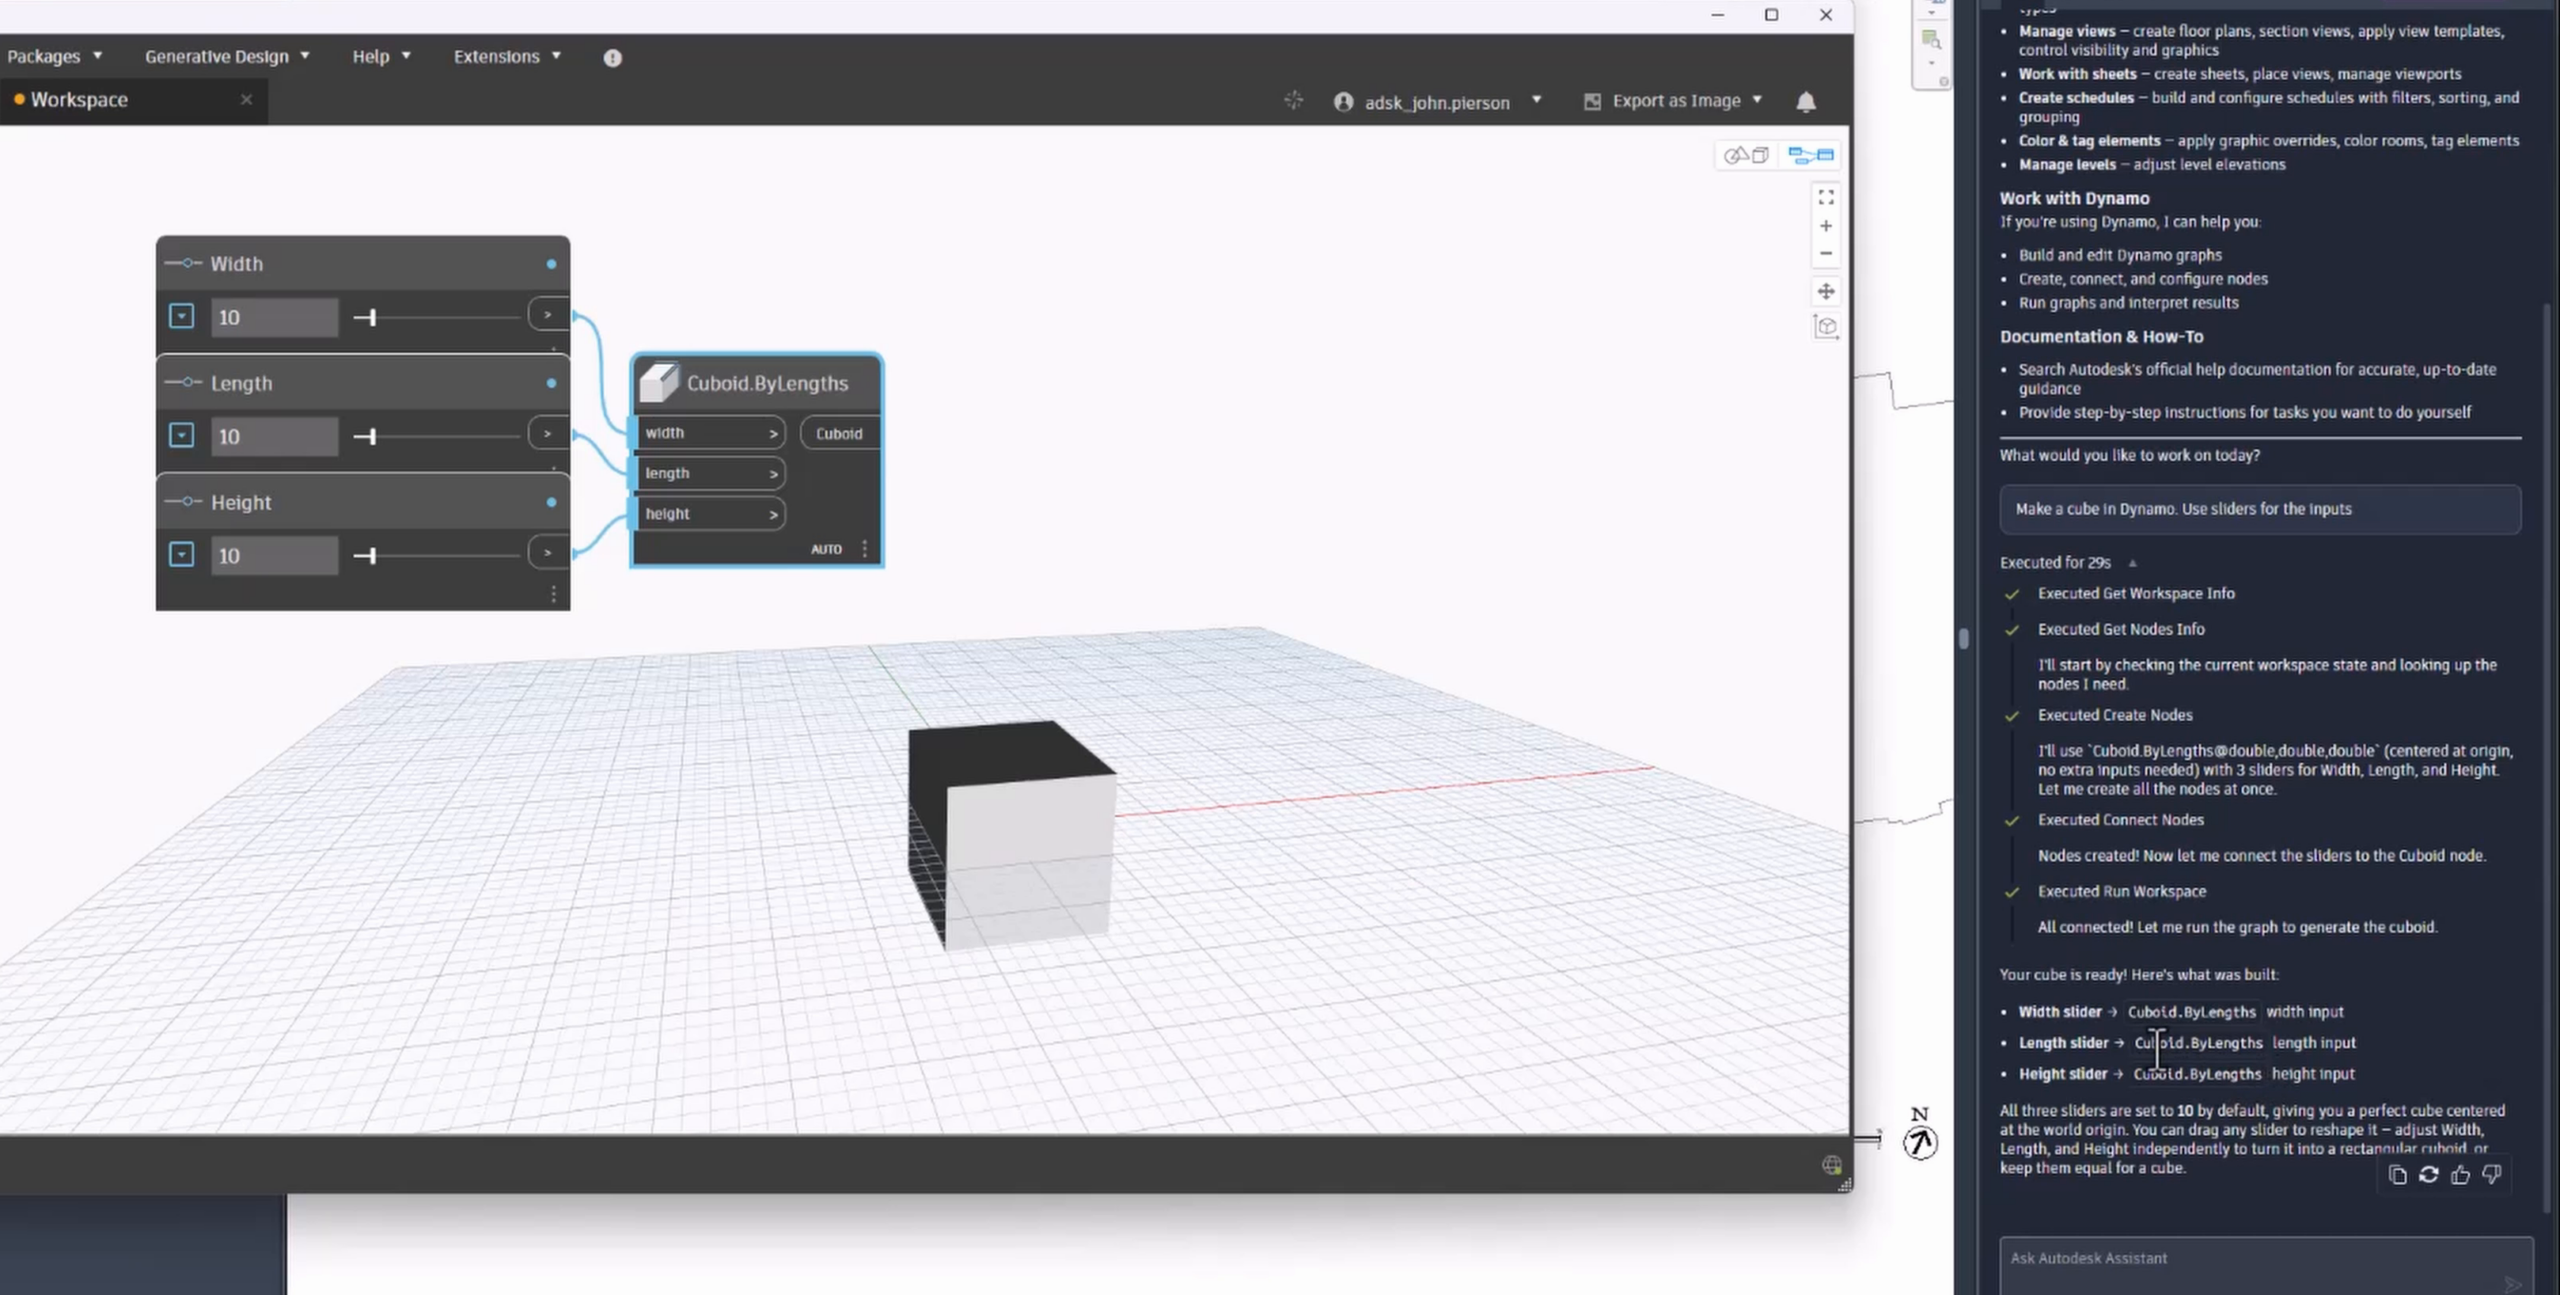
A cube is not going to change your day. What matters is that the Hello World of Dynamo is now one sentence away, and every step past that builds on the same interaction.
Ask first, then build: collect all walls
Since we are in Revit, let’s ask about Revit.
Every Dynamo node has had a help file for a long time. Click a node, choose Help, and you get a description, sample, and inputs and outputs. Those same help files also feed the Node Autocomplete machine learning model that has been in Dynamo for a while. Autodesk Assistant and Dynamo MCP lean on both, which is why the answers are grounded in nodes that actually exist.
So if you are new and do not know where to start, ask:
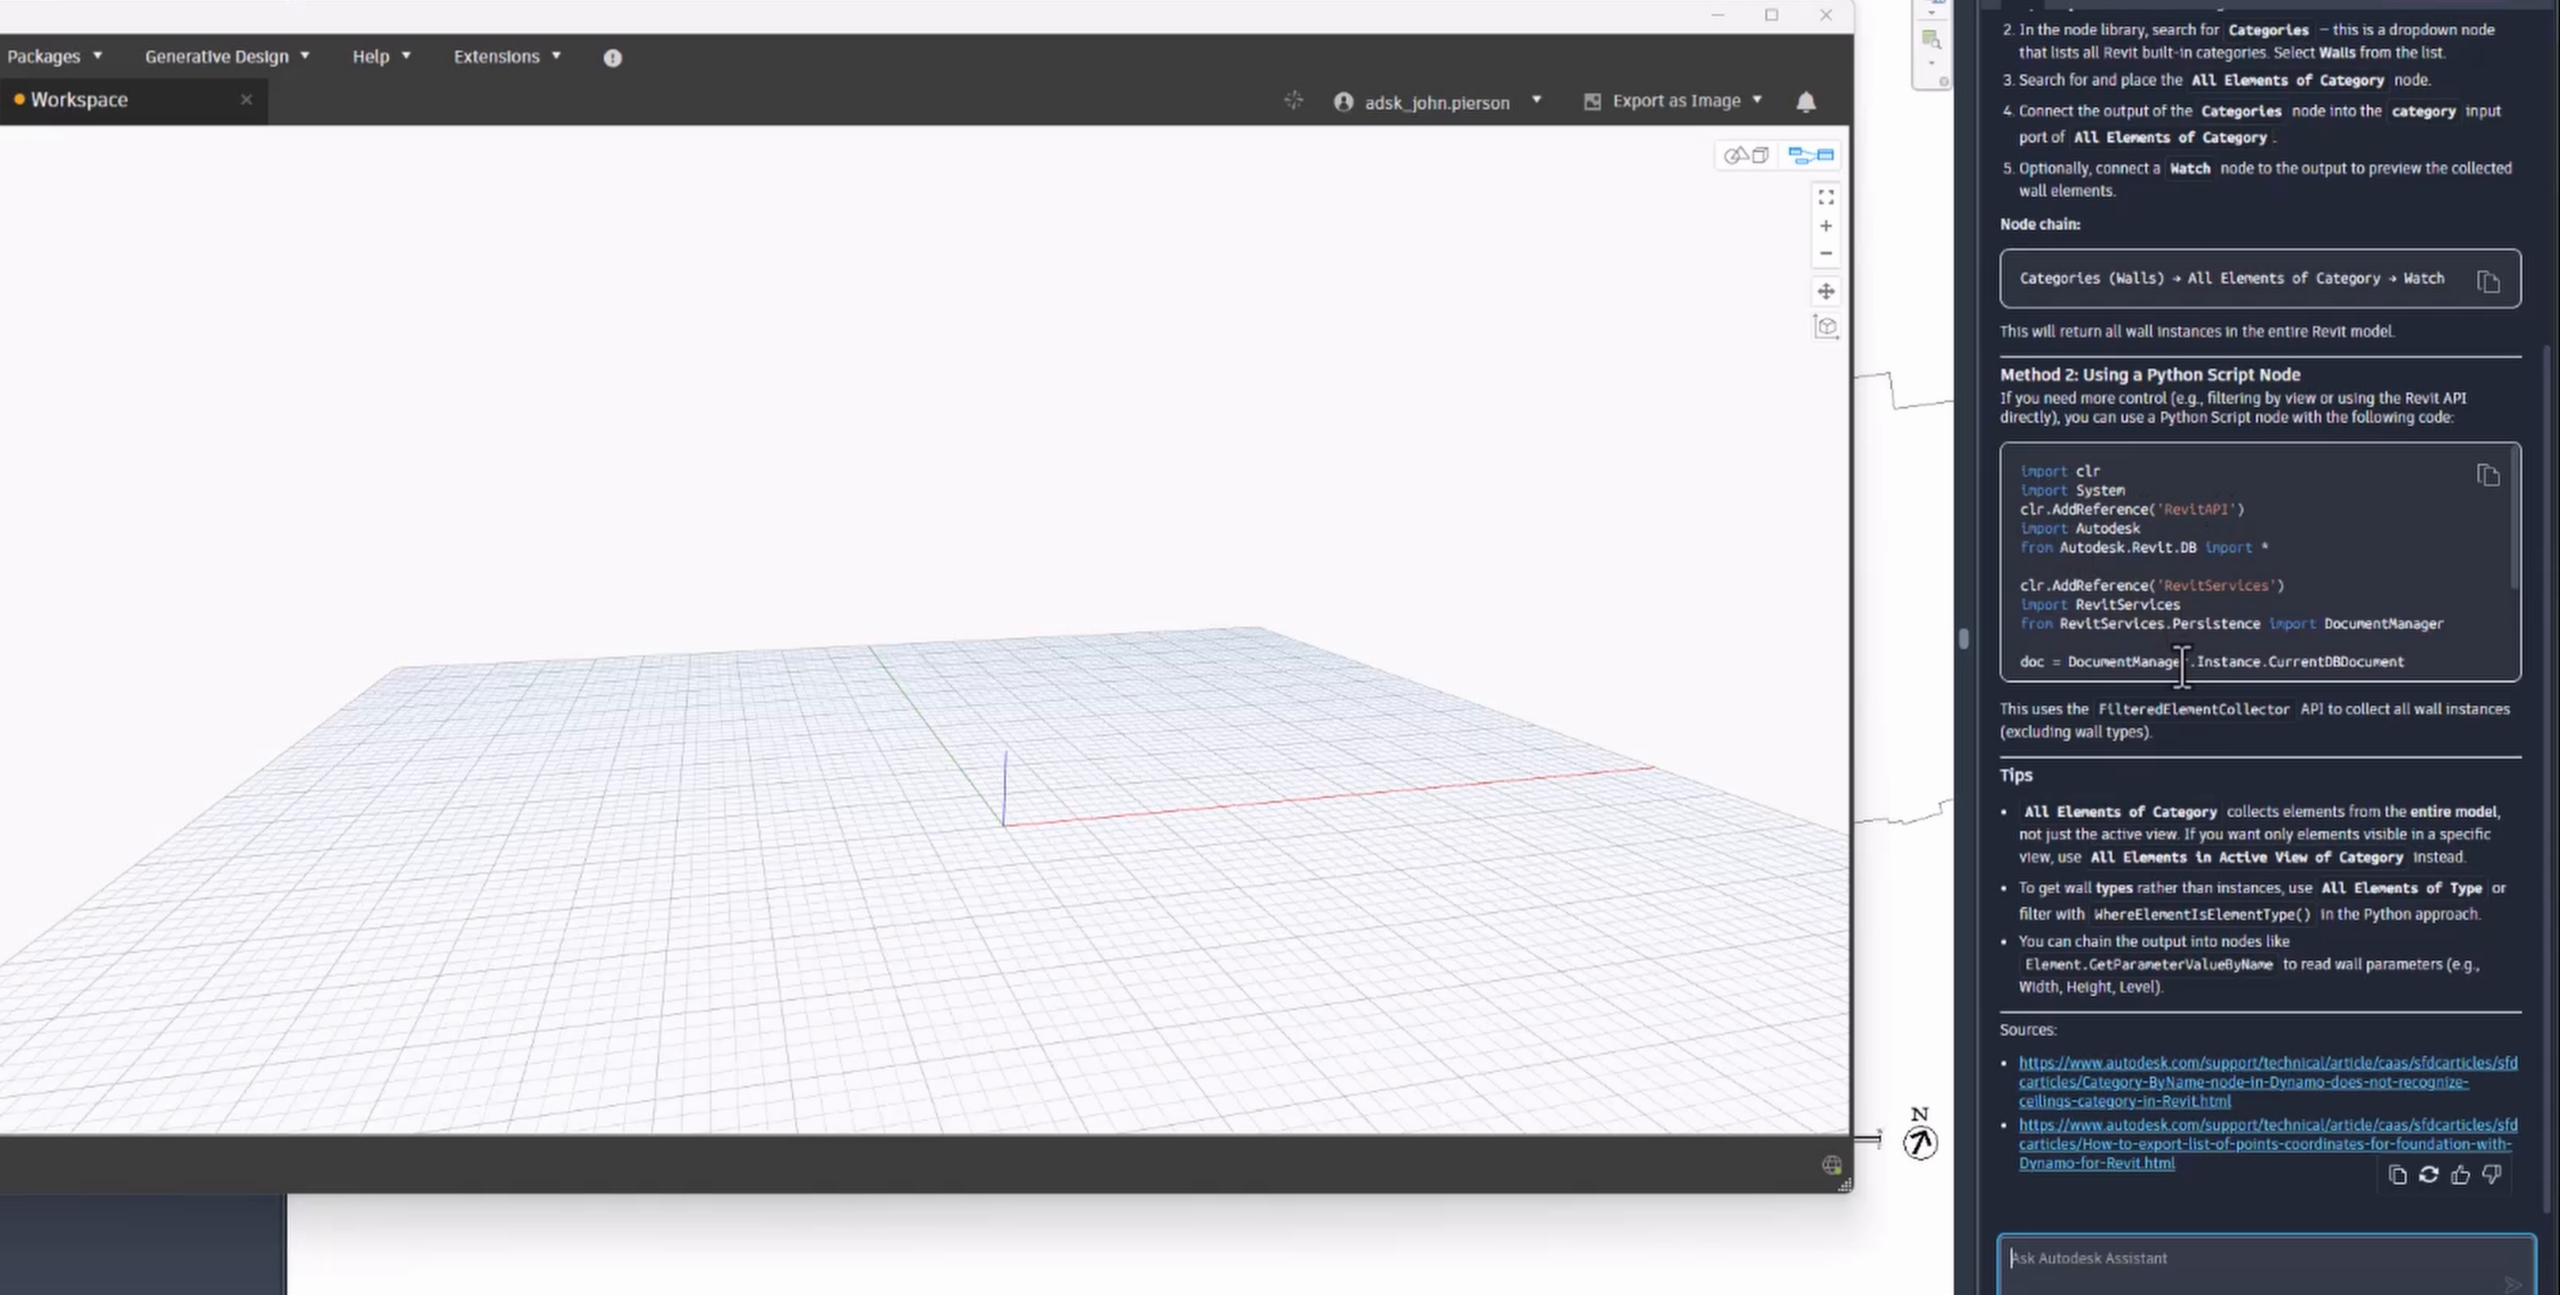
How do I collect all walls in Revit with Dynamo?
Assistant answers the question first. In the video it offers two routes: the out-of-the-box nodes (Categories, All Elements of Category, and a Watch node to see the result) or a Python approach.
Now that you have the explanation, ask it to act:
Build me a Dynamo graph to collect all walls.
Assistant runs through the same tool calls as the cube example, places the nodes, then works out that the Categories dropdown needs to be set to Walls and selects it. It also groups the nodes and gives the group a sensible name.
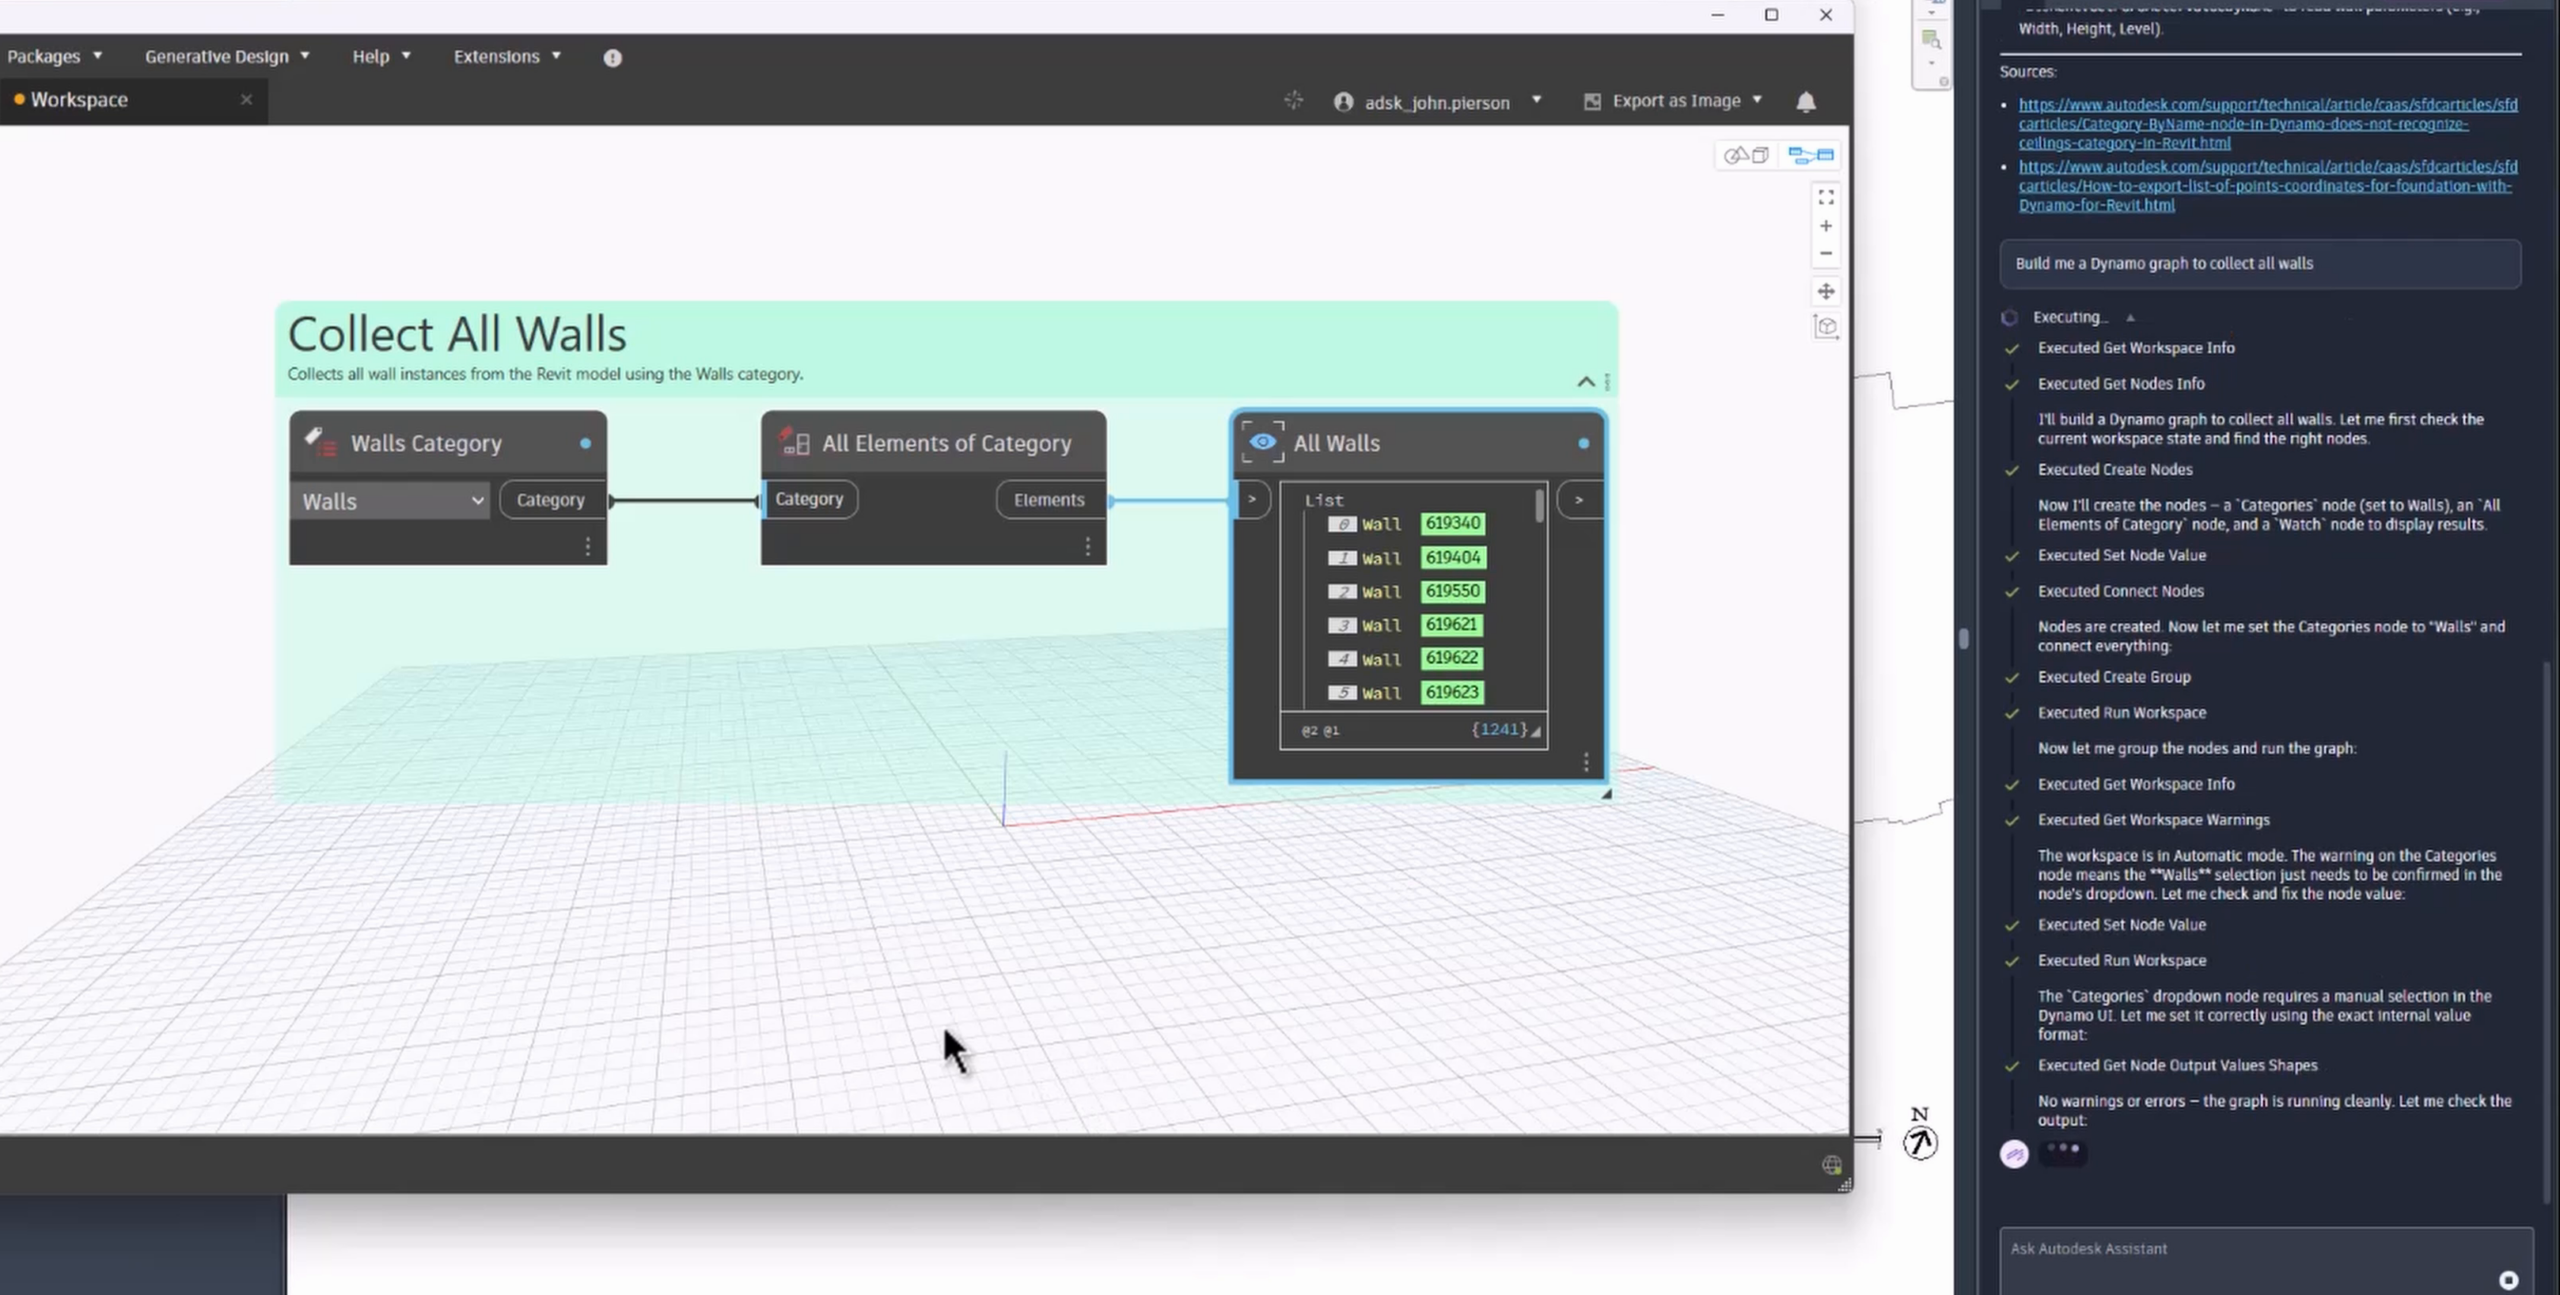
Collecting Revit elements is the first thing every Dynamo user learns, because you cannot filter or modify anything you have not collected yet. Getting the explanation and the working graph in the same conversation levels the playing field for people who are just starting out.
Explain a graph you did not write
The other thing Assistant is good at is reading graphs, not just writing them.
In the video, we open a graph that used to be clean and deliberately ungroup everything. If someone hands you a graph like this, ask:
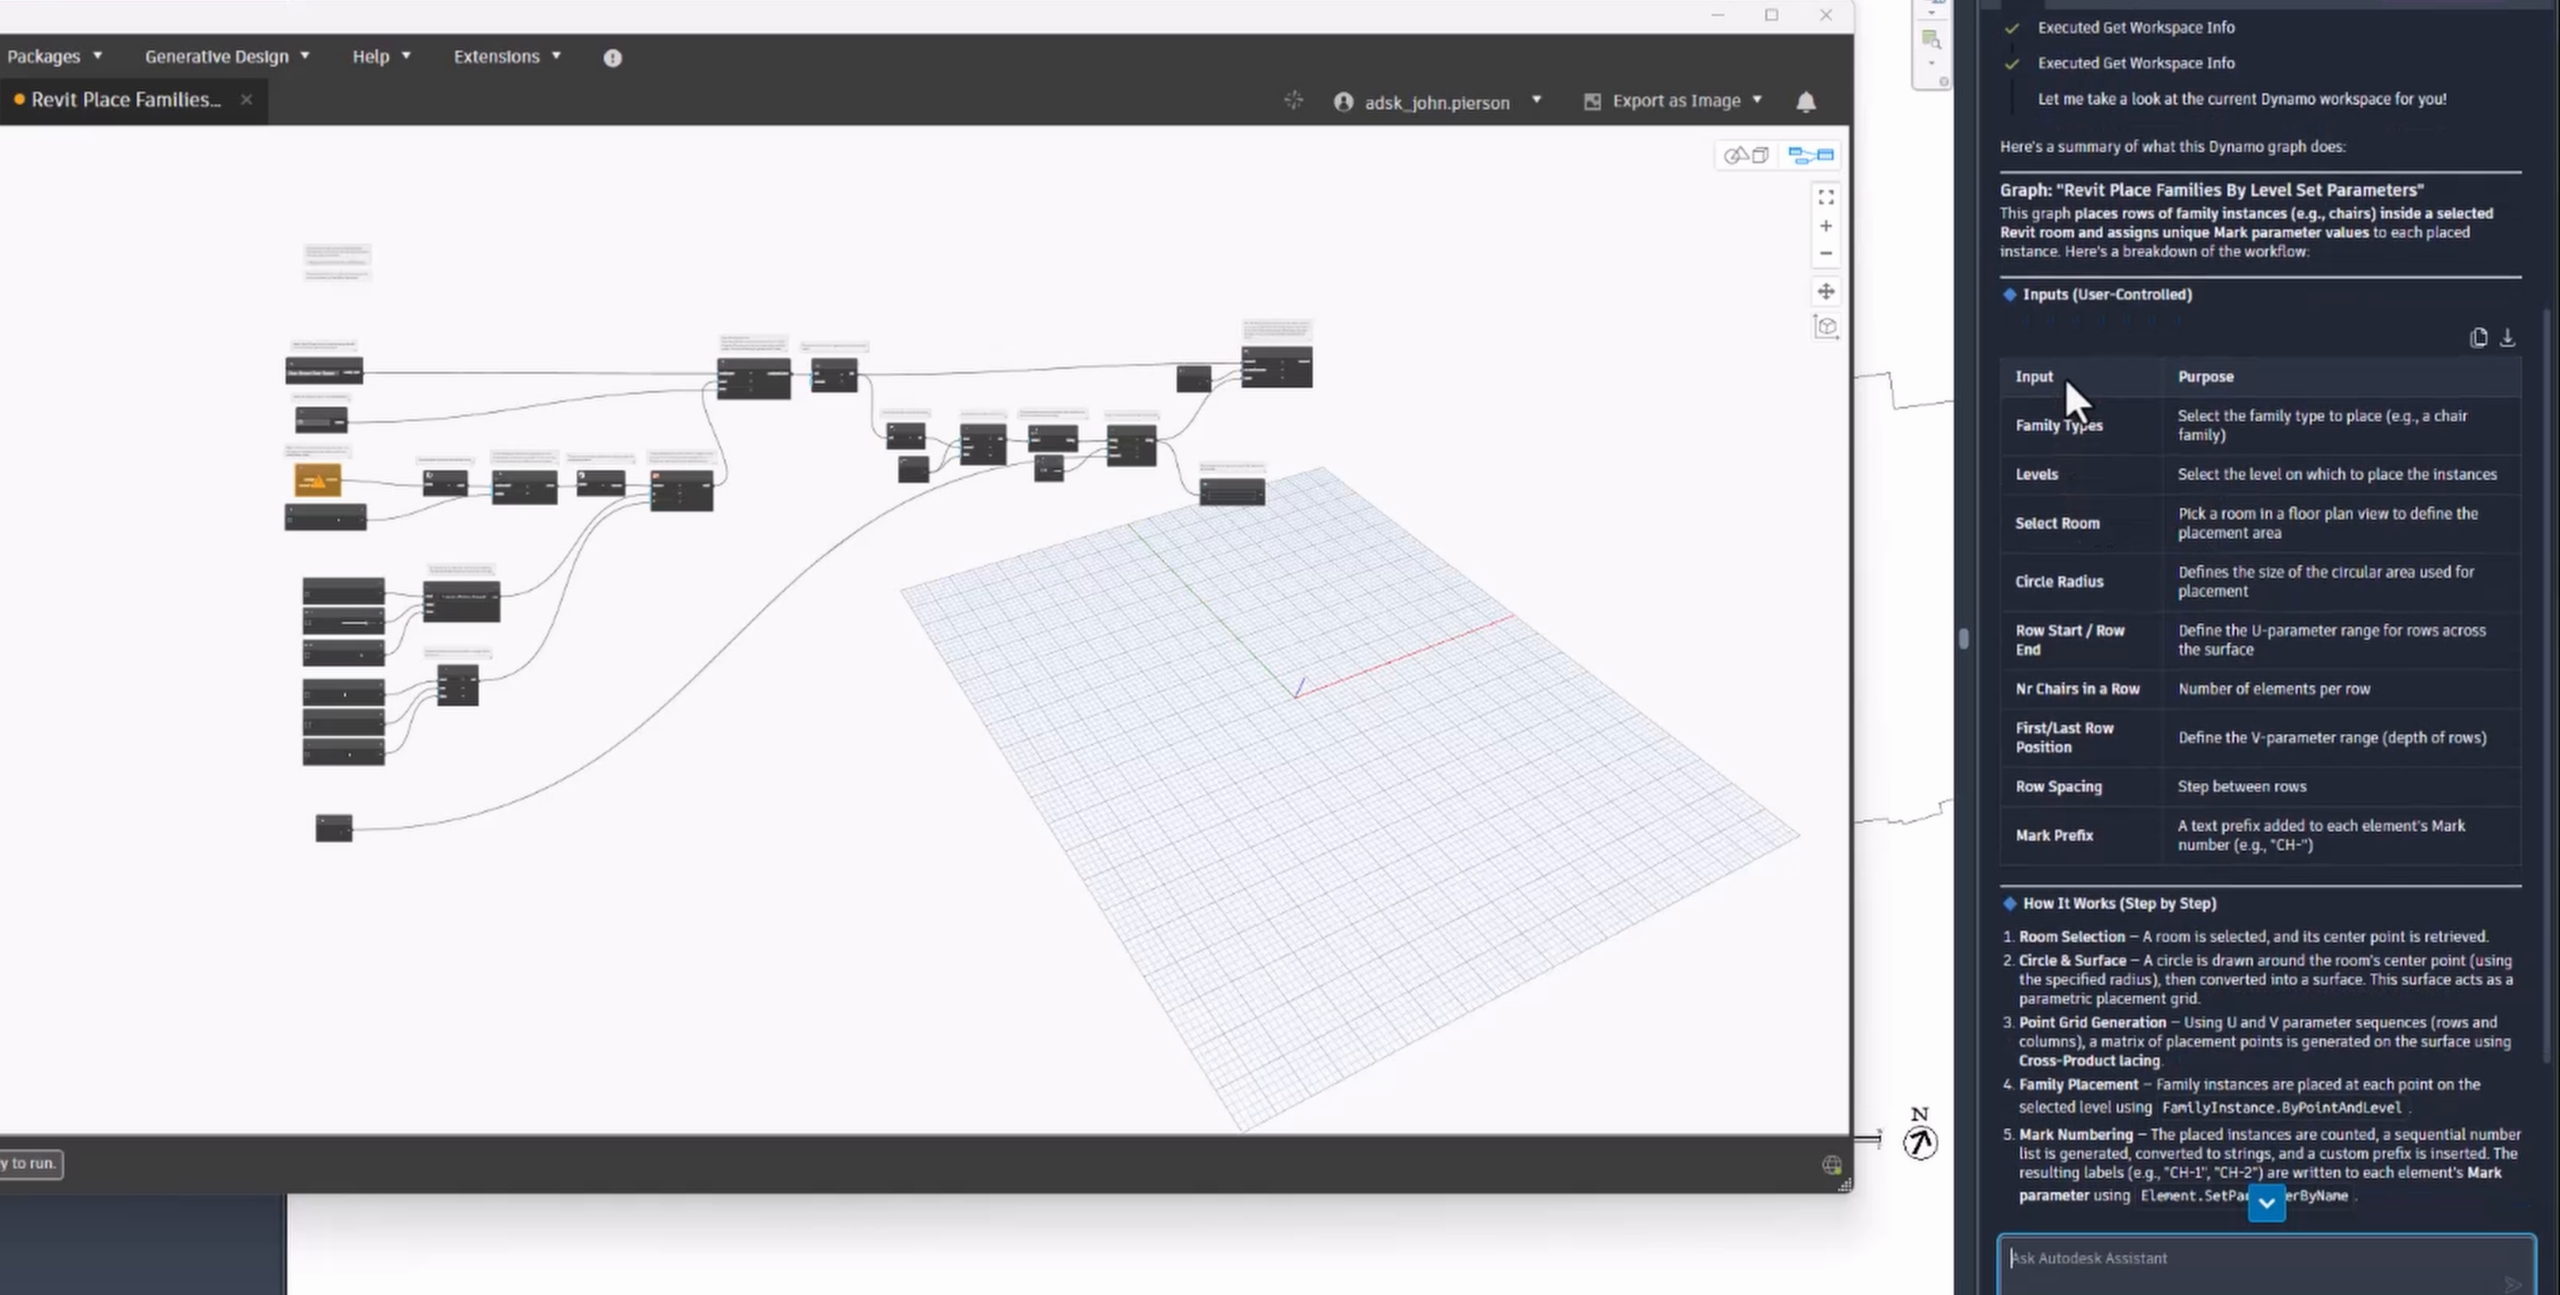
What does this Dynamo graph do?
Assistant queries the open workspace through Dynamo MCP: every node, every connection, any existing groups or notes. Then it explains the graph in plain language. In this case: it places families by level and sets their parameters, and it takes a handful of inputs.
Recognizing which nodes are inputs is not always obvious when you are looking at a wall of nodes. Dynamo’s Graph Node Manager extension has long let you filter by Is Input to find them. Assistant figures this out as well and gives you a step-by-step breakdown of the graph with its inputs, what each stage does, and what comes out the other end.
Group and annotate it the way an experienced user would
Once Assistant understands the graph, ask it to clean it up:
Create groups in this graph to help understand it.
It reuses what it already learned about the graph and creates groups with descriptive titles, plus notes where they help. If you have used Dynamo’s group styles, you will recognize the result right away. Assistant applies them the way an intermediate or advanced user would:
| Group style | Color | What landed there |
|---|---|---|
| Inputs | Pink | Every node marked Is Input: family type, level, room, radius, row sliders, mark prefix |
| Actions | Green | The nodes doing the work: placement area, grid, placing the family instances |
| Outputs | Orange | The results |
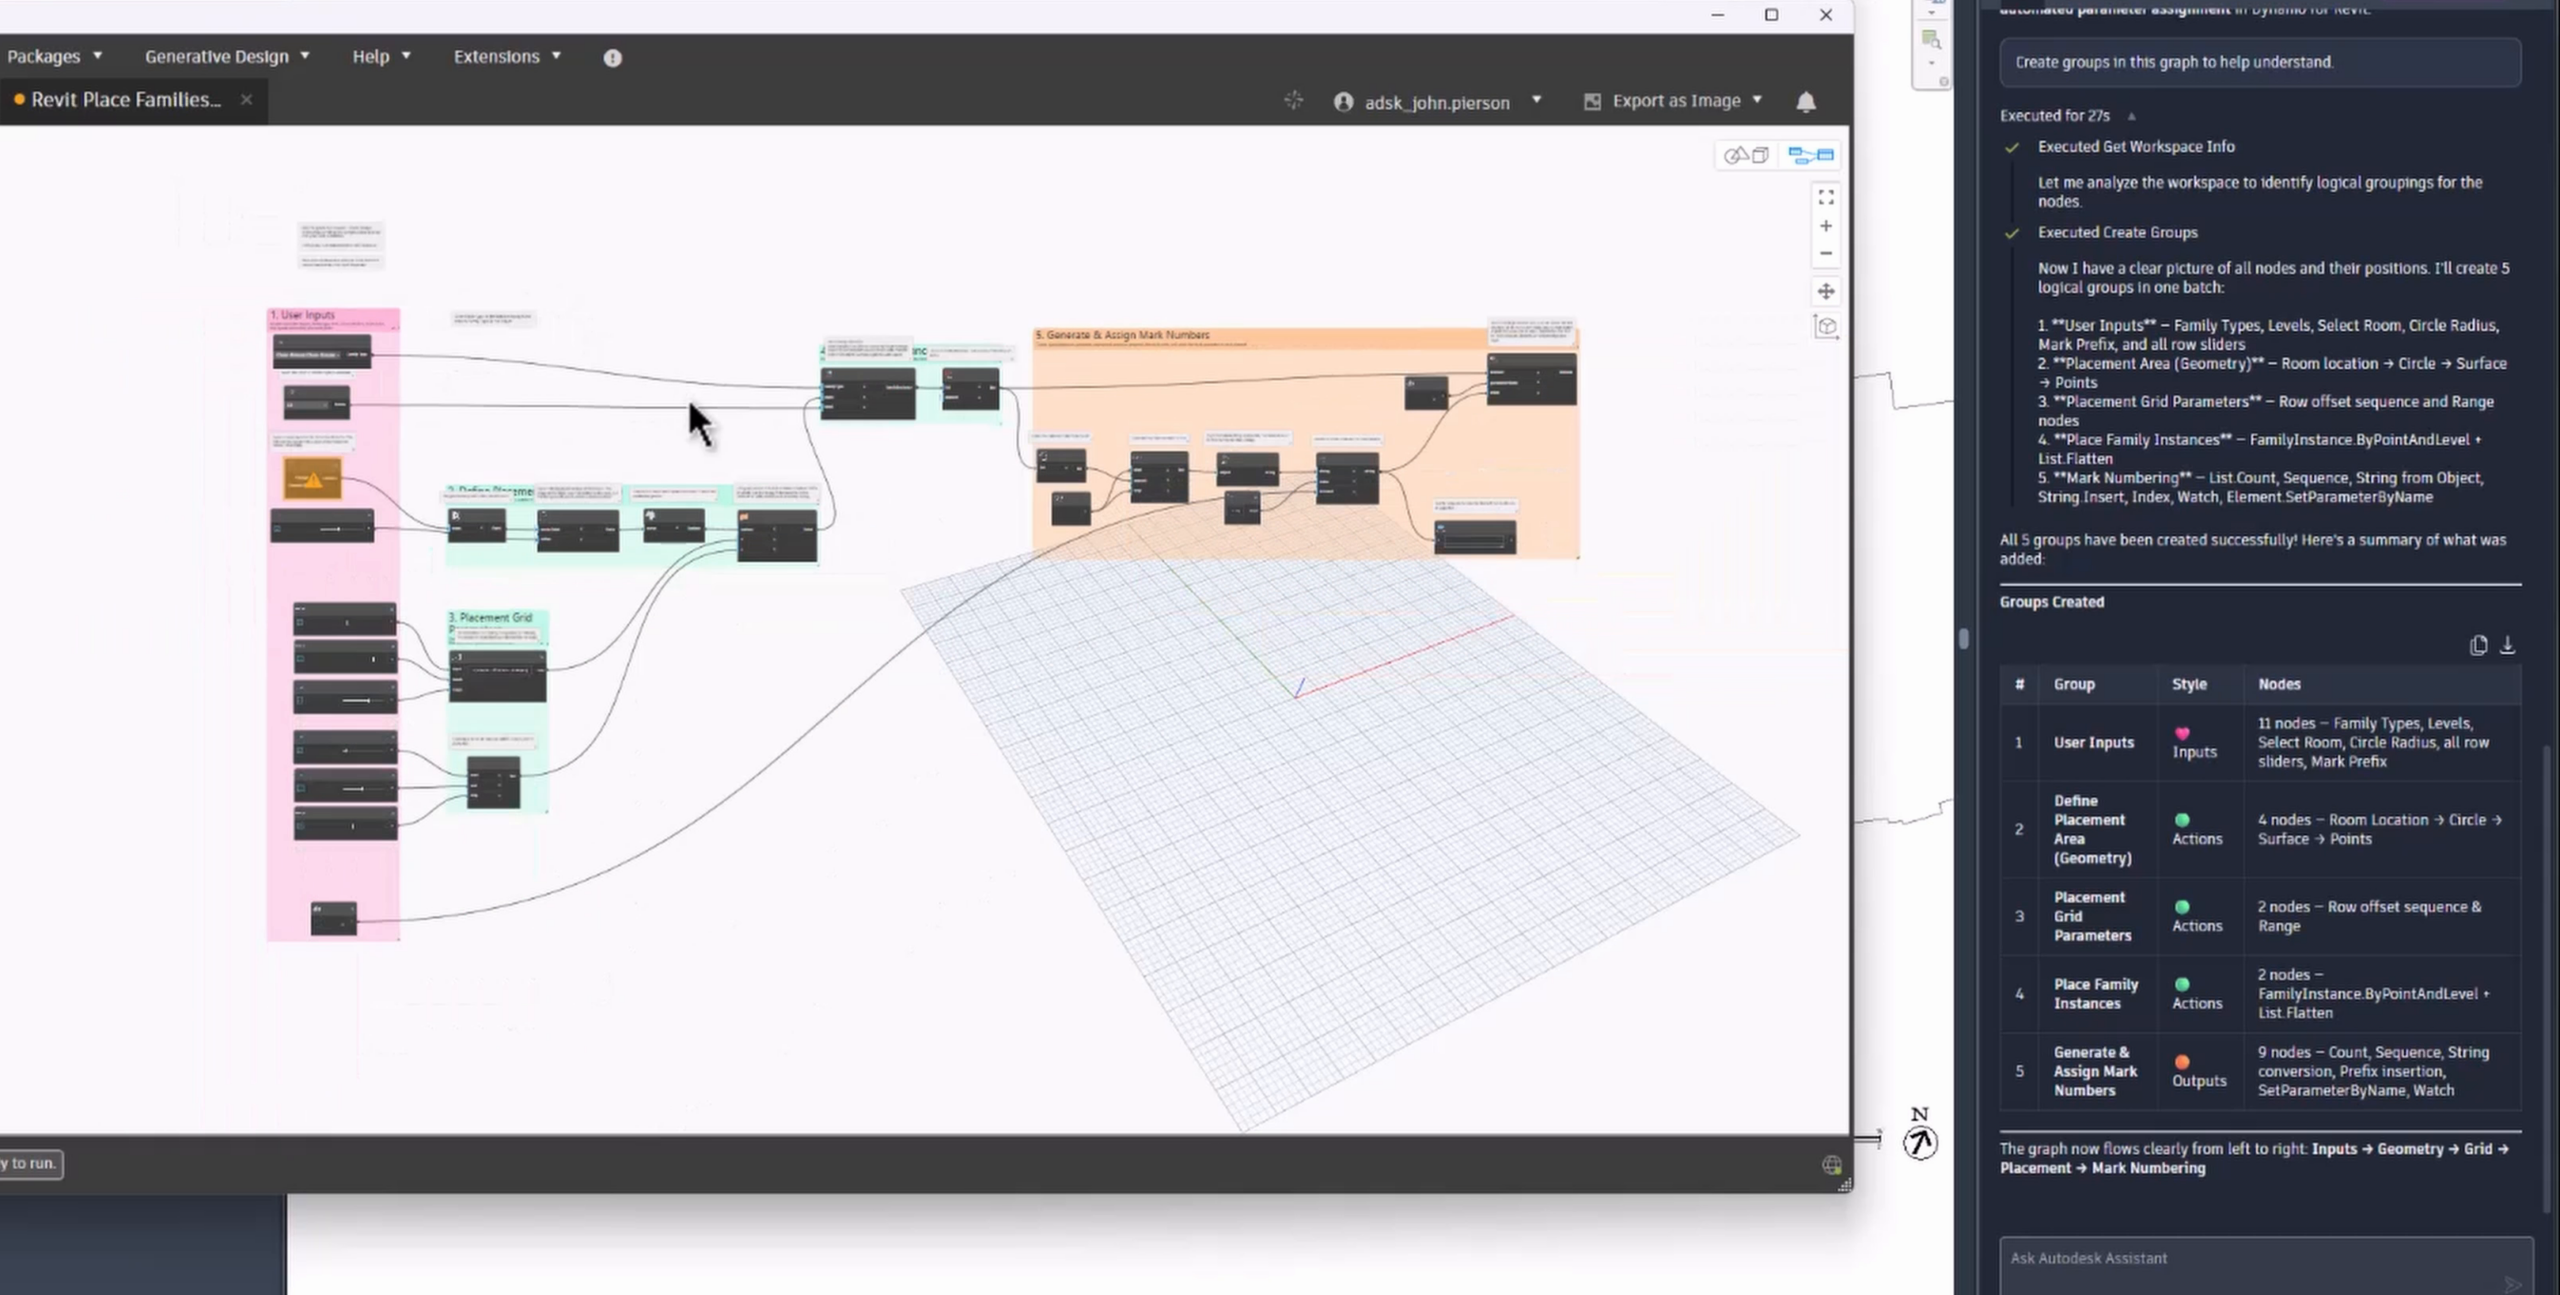
Grouping and annotating graphs is important, and it is also the first thing most of us skip when we are in a hurry. Assistant removes that friction. Let it do the first pass, then refine the names and boundaries yourself if you want to.
A few more things to know
- Python too. Assistant can write Python inside Dynamo as well. That is not in the video, but it works the same way: describe what you want and ask it to build it.
- Group as you go. On a larger graph, ask Assistant to group along the way rather than at the end. It keeps the workspace readable while you iterate.
- Same safeguards as Sandbox. Everything in the 4.2 release post still applies: Assistant will not open another graph over unsaved changes, will not run a graph that is not trusted, and requires sign-in with Autodesk Identity. It is unavailable in no-network mode.
Sign me up! How do I get this?
- Revit 2027.3 includes Dynamo 4.2.1 and Dynamo MCP. Enable Autodesk Assistant in Revit and you are ready.
- Dynamo Sandbox users can grab 4.2 from dynamobuilds.com or the GitHub releases page and use the Assistant panel inside Dynamo.
- Full details on everything else in 4.2 are in the release post and the release notes.
Tried it? Tell us
This is the first time Dynamo MCP is in the hands of Revit users, and feedback from real graphs is what shapes what comes next. Head to the Dynamo Forum and tell us what worked, what did not, and what you wish Assistant could do. The team reads it.
With each release, Dynamo grows more and more powerful, and we’re so grateful to have you along for the ride. Curious what else we’re working on? Visit the Dynamo Roadmap to see current and upcoming work and let us know what you think.
The Dynamo Team