Generative Design is great for a variety of workflows. Some of the simplest workflows to utilize involve randomization. With randomization you are able to quickly iterate through designs, filter down what lends itself to more discussion and refine further.
However, the real power of Generative Design is found when you start to run multi-objective optimization and solve for defined goals. In this post, we are going to explore a workflow for laying out ceiling grids in a way that reduces the material that needs to be cut. This is great because it enables easier fabrication and reduces material cost and waste.
Workflow Overview
Goals – What problem are we providing a solution for?
How to layout tiles on a given surface so that the least number are cut off and the least amount of tile waste goes to the landfill.
Variable Inputs:
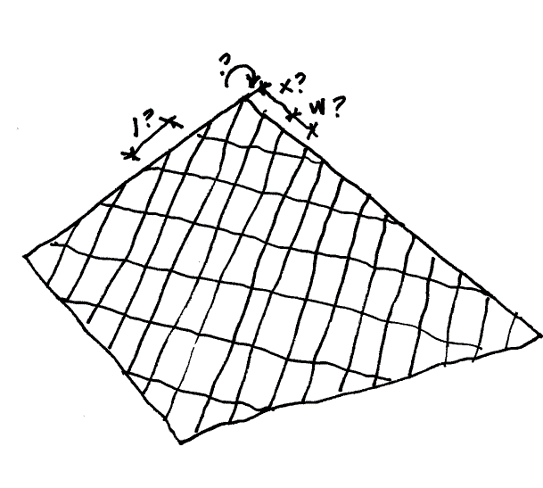
Tile width
Tile Width Offset
Tile Length Offset
Tile Rotation
Defined Goals:
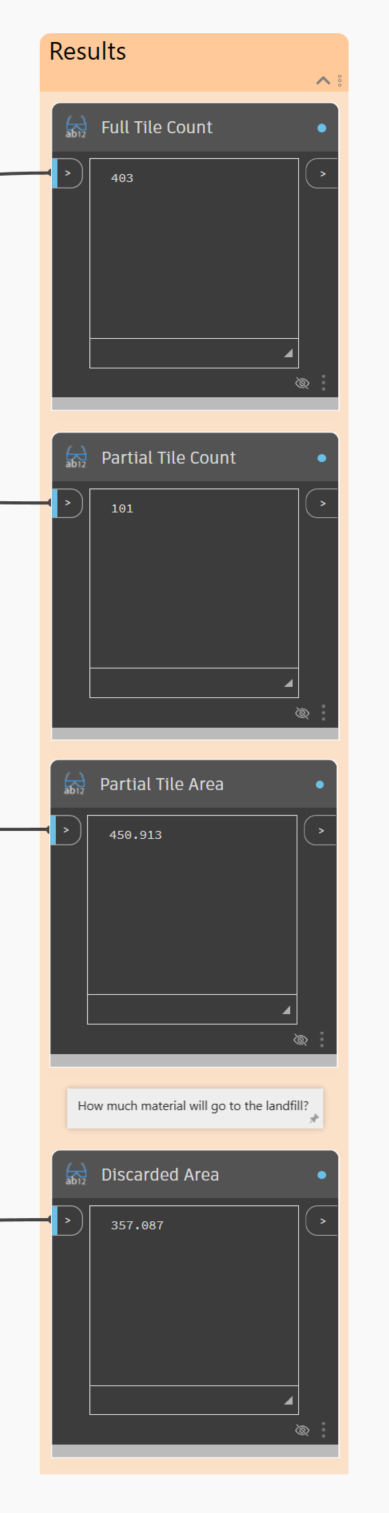
Maximize the number of whole tiles
Minimize the number of partial tiles
Minimize the amount of discarded area
Graph Overview
(NOTE: the fully annotated graph is supplied in the dataset at the end of this post)
Inputs
Select Face
This is the base face (floor) to use for the tiling workflow.
Tile Width
Set the target tile width. This is useful for workflows that have tiles that are constrained to a known dimension. (Note: You can also set this to be adjustable in Generative Design)
Tile Length
Set the target tile length. This is useful for workflows that have tiles that are constrained to a known dimension. (Note: You can also set this to be adjustable in Generative Design)
Width Offset
Variable to assist in the optimization workflow. (this enables us to reduce the cut tile amount)
Length Offset
Variable to assist in the optimization workflow. (this enables us to reduce the cut tile amount)
Rotation
The rotation variable will allow Generative Design to solve for the best orientation based on the selected face.
Sloped Glazing Type
In this workflow, we are using the graph to create a sloped glazing element in Revit. This enables material takeoff and better downstream use of the results.
Ceiling or Floor Level
The level to assign the created sloped glazing to.